Manage cookies that are used for advertising, such as ad personalization, remarketing, and ad effectiveness analysis.
1.11. Work with API
Token
A token is required to work with the API. The token is associated with the account and allows you to manage all services available in it, including delegated.
Activate
- Open the "API" section.
- On the "Access data" tab, check "I agree with user agreement and terms of service" and click "Activate token":

Expiration date
Token is valid for 6 months:
- If used — since the last time it was used.
- If not used — since its creation.
Limits
Request limit — 60 per minute.
The limit is a counter that increments by 1 every second, with a maximum value of 60. For example, if you use up the entire limit in a single second, you’ll be able to make one request again after just one second. If you do not make any requests after the limit is exhausted, the limit will return to its standard value of 60 after one minute. Limits based on seconds, hours, days, etc., do not apply.
Information about the time of the last request and the current number of available requests is displayed in the "API" section.
Each response contains HTTP headers:
X-RateLimit-Limit: 60— request limit.X-RateLimit-Remaining: XX— number of requests remaining before the limit is reached.
When the limit is reached:
- A 429 response code is returned.
- The response contains the following error message: "Too Many Requests per minute. Look on Retry-After and X-RateLimit-* headers".
- The
Retry-Afterheader is added to the response, specifying the number of seconds to wait before sending a new request. - A notification is sent to your email and to your connected messengers (but no more than once a week).
Security
Attention!
It is strongly recommended to configure restriction of API access by IP.
Access restrictions are configured in the "API" section on the "Access restriction" tab: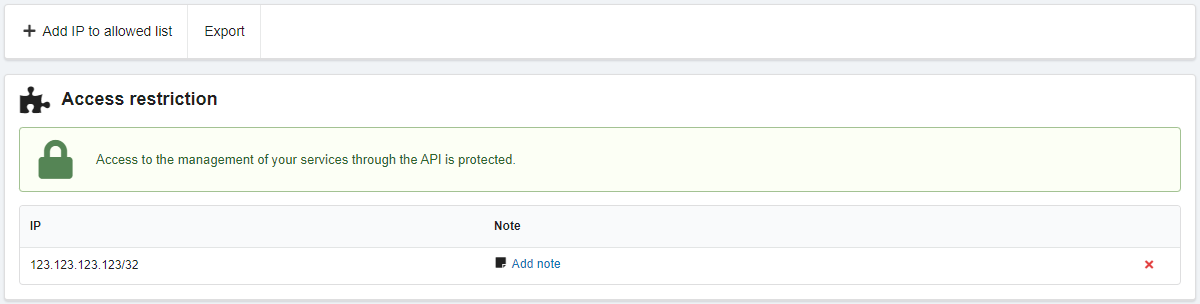
The working logic is as follows:
- Address list is empty — access is open for everyone.
- There is one or more addresses in the list — access is open only for addresses from the list, for the rest access is closed.
Addresses and subnets in CIDR format are added to the list of allowed addresses using the "Add IP to allowed list" button. All added addresses are displayed in the list below. You can add a note to each of them or remove them from the list.
Documentation
You can find the list of methods, their descriptions, test their work and get code samples in the "API" section on the "Documentation" tab. The tab consists of several blocks.
Methods
The "Methods" block displays a list of available methods: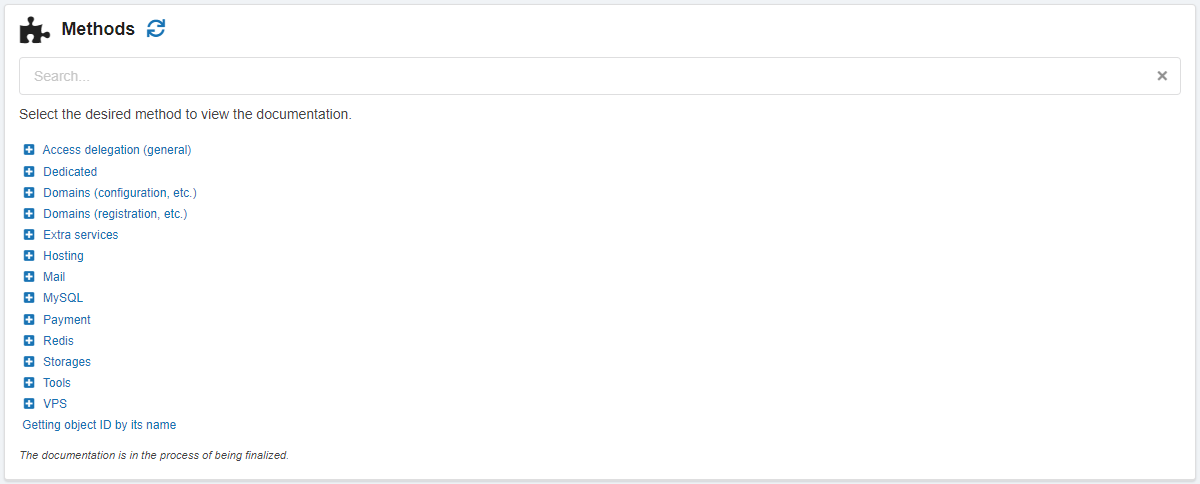
Method description
Attention!
The documentation is still being developed, so detailed descriptions are not available for all methods.
Block with the name of the selected method contains its detailed description: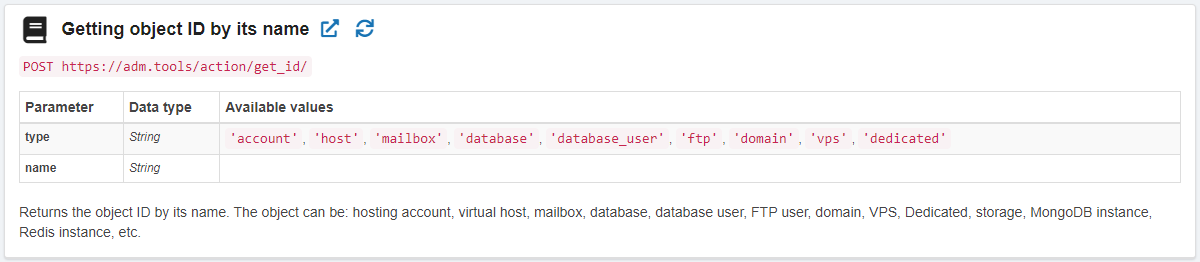
- Request sending method — GET or POST.
- URL — address to which the request should be sent.
- Parameters — list of available parameters, data types for each of them and variants of available values.
- Detailed description of the method and its return values (not for all methods).
Request execution
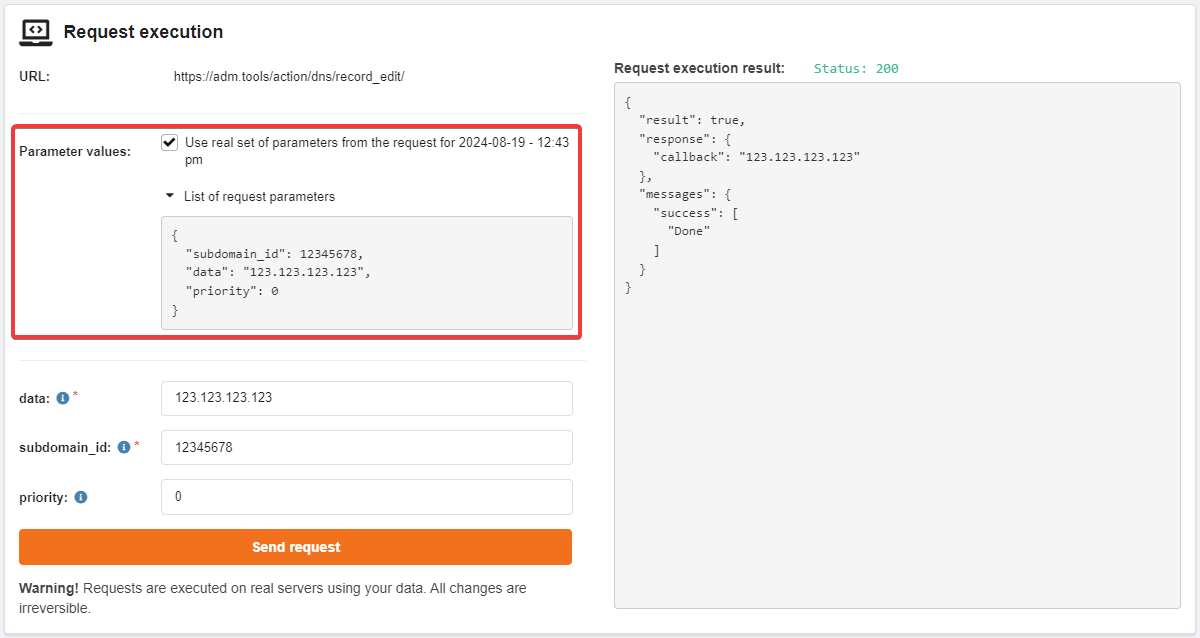
The left part of the "Request execution" block contains a form for quick sending a request on behalf of the current account, the right part displays the response code and the result of the sent request: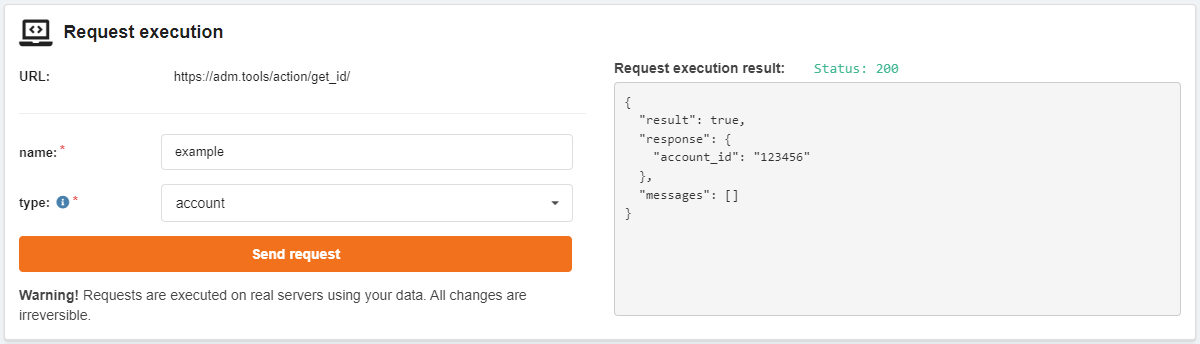
Last request data
In API documentation, the "Last requests" block is displayed at the top with a list of the last 10 requests in the last 10 minutes that were executed from your account via the control panel (direct requests to the API are not captured). Clicking on the request opens the method description and substitutes the real data of the last request into the execution form.
When an action is performed in the control panel, the system automatically captures the data of the last request to the corresponding method and stores it for 10 minutes. During this time, the documentation on the method page will show the date and time of its last call, you can view the list of parameters passed to it and substitute these parameters into the request form. For each method, only the data of the last 1 request made in the current account is stored.
Code example
The "Code example" block outputs sample code for using the current method using cURL or the HostingAPI library: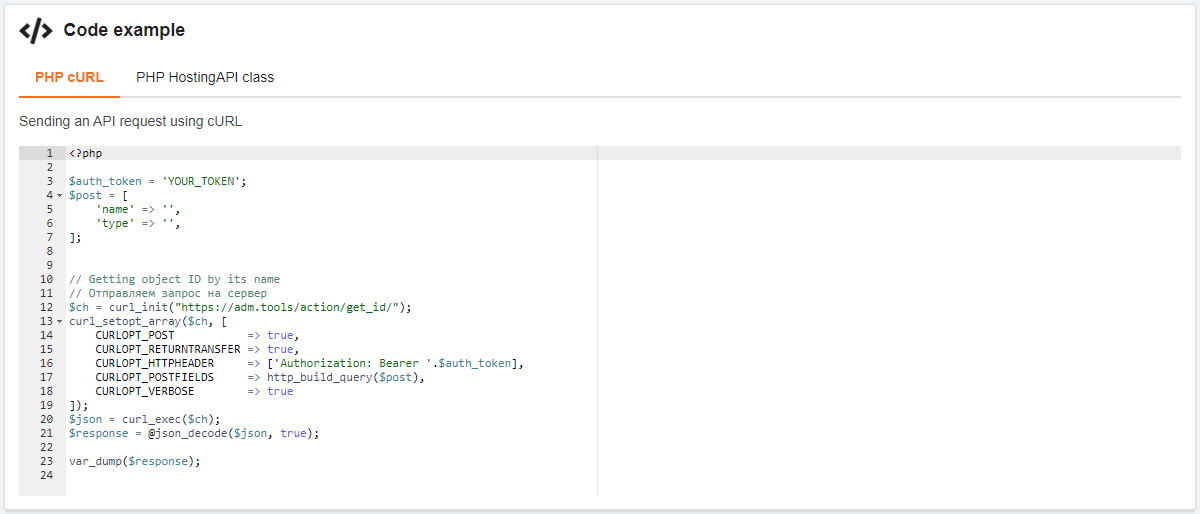
- The current active token is automatically substituted into the string with the parameter
$auth_token. If the token is not active, it will have to be activated and substituted into the code manually. - Parameters from the form are automatically substituted into the string with the parameter
$postafter the request is executed. If the request was not executed, you will have to specify the parameters yourself.
(2)